 Nikon DSLR Video Videography News, Tutorials, Reviews, and Information

If you’re shooting video with a Nikon DSLR, chances are from time to time you shoot still photos as well. Still photography may even be your primary gig. During a recent trip to Chicago, I wanted to get some still photo cityscapes of the windy city and thought I’d share my experience trying to capture a great downtown Chicago skyline cityscape.
When figuring out where to shoot, there were two top recommendations: The top of Willis Tower (the old Sear’s tower – called Skydeck Chicago) and the top of the John Hancock building (360 Chicago). Because of the vantage point of the city and the fact the time we had allotted was for the evening sunset, we decided on the latter.
I then tried to do as much reading as I could to determine what equipment I could bring. I saw varying reports – some said tripods were OK as long as you weren’t in front of someone or blocking the view, one that said you could bring a tripod but not open it and use it as a monopod, one used a video monopod that had small feet at the bottom, and one that recommended taking in a gorillapod because it was small enough to get past security.
I decided to take a gorillapod (and have my wife put it in her purse) since it’s relatively versatile and I had one already. Before riding the elevator up to the top, all of our bags were inspected. The lady searching saw the gorillapod and said, rather flippantly, “you can take this up – but if you think you’ll open it and use it, you should leave it down here with me. If you open it…you better be prepared to pay like…$800 or $1000 dollars.”
My first inclination was to roll my eyes and say, “how do you expect to get me to pay $1,000 dollars for opening a tripod,” but instead just said we’ll keep it and we won’t open it. And, we didn’t open it.
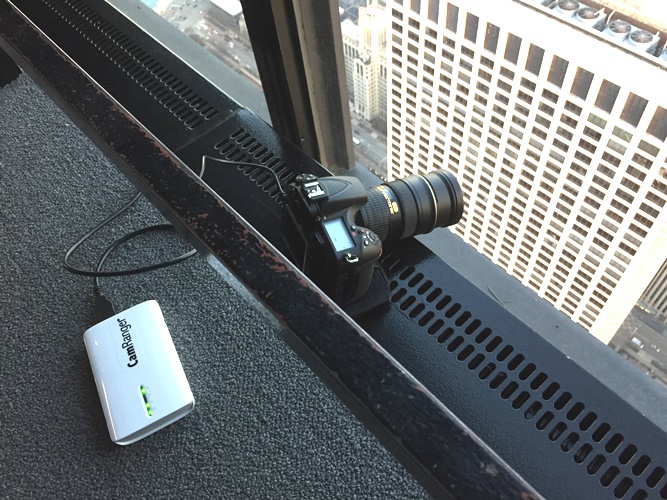 We arrived at the top to find it was under a considerable amount of construction which meant only a few window panes were available to view the southern view of the city. After hanging out for a few minutes, I found a little place under a small stairway that I could hang out in and set my camera next to the window on a vent.
Stabilizing the Camera
Because the vent was so low, and I wanted to avoid any shake, I used a CamRanger hooked up to my iPhone to take the picture and see what was being shot. The angle was just right, so I used the pouch of the CamRanger and a few other random items (like the lens cap) to prop up the body and lower the shooting angle.
Then, I waited until the light was right and snapped away.
Processing the Chicago Skyline Cityscape
I had intentions processing the cityscape using HDR in lightroom or photoshop, but I realized two things while looking at the files. First is that the D810 raw file size makes compositing three raw images together a task for a super computer, and also, that the D810’s detail in the shadows is outstanding. I ended up using a single frame and editing in lightroom.
The shot I used was a 20 second shot, at F/10, and ISO 64 with a D810 with a Nikon 24-70 at 24mm.
In all, I’m pleased with this cityscape of the Chicago skyline – which my wife said needed to be “worth the price of admission” to 360 Chicago. Mission accomplished – even without a tripod or using HDR.