 Nikon DSLR Video Videography News, Tutorials, Reviews, and Information
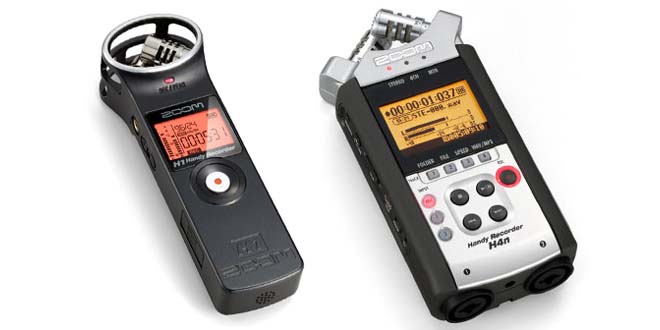 We’ve been filming weddings professionally for several years now, and we’ve found that Zoom Audio products work well, but they aren’t without their challenges. Here are 5 tips to help you get the best audio for video with the Zoom H4N and Zoom H1
1. Avoid the dreaded “Card Write Error” by using a better SD card and formatting before each use.
There’s nothing worse than telling a client or bride that audio from the ceremony, speeches, or corporate event that can’t be re-shot is gone because of a technical glitch. And you will see the error on the screen eventually. There are ways to limit your chances of having these problems by upgrading your SD cards.Zoom has a published list of approved cards but the list is so old that most of the SD cards aren’t even on the market anymore. We took time to examine the list and try to figure out which brands they preferred and the size and found comparable units currently on sale.
For the Zoom H4N, we purchased the Sandisk SDSDB-4096-A11 4 GB SD Card
and for our two Zoom H1
units we purchased SanDisk 4GB MicroSDHC Card
. Both are under $10 and have worked well.
We’ve also gotten into the habit of making sure we format each SD card before every shoot. The H4N allows this to be done in the unit and we use our PC with the Micro SD/SD adapter to format the Zoom H1 card.
There are no guarantees this will work 100% of the time, but we’ve found these upgrades and process limit the number of card errors we get. Also worth mentioning, is that the Tascam units we’ve looked at have similar issues – so both major brands have their issues, it’s just a matter of dealing with them.
2. Don’t use Auto Gain control
Some people love using Auto Gain control on recorders, however we don’t. We generally have to do some post-production audio work regardless of how well it’s recorded on site. We edit things out like a sniffling bride, a sneeze from the congregation in between vows, but also even out the levels to the point that makes sense for our production.
The problem with auto gain control is that it may make post-processing more difficult as the volume can swing wildly depending on what the Zoom though was appropriate. When those gain swings happen, it makes it harder to edit the entire file later. Yes, there are ways to fix it, but why create extra work for yourself?
Our advice is take set the audio low enough to capture even loud statements and laughter without peaking. It will be relatively soft right out of the card, but bringing audio up a uniform amount is much easier than dealing with a sound file that the device was determining the gain the entire time. The Zoom products do a great job of recording even at low levels, so bringing them up in post doesn’t create any discernible noise issues.
3. Use MP3 compression
Unless you’re recording a project for mass reproduction or extreme clarity, MP3 compression is fine – don’t waste your memory card space with WAV files. More important than your bitrate is the quality of your microphone.
4. Turn Lo Cut Off
As we mentioned, we do a fair amount of audio work in post-production – so we don’t want a relatively cheap piece of equipment making the decisions on what low frequencies to cut off. I’d rather get the whole file and cut out what I need to using Adobe Audition. Sometimes, the low-cut feature can leave voices sounding hollow and tinny, making even more work during post-production to bring that vocal clarity back.
5. Always have at least one backup, preferably two.
When filming weddings, there are no re-dos. On-camera audio isn’t even close to a quality backup, so think through other ways of recording audio backup. We use a 3 Zoom setup. Typically, every venue will have some sort of sound board or house mic for the officiant to use. If there isn’t, the DJ or Band will typically cover this duty. Regardless, we typically run a line to whatever board is powering that system for a direct feed. If the ceremony will have readings, multiple mics, strings, etc. all wired through that – we’d run two recorders: one primary, one backup. We daisy-chain the backup with a mini-stereo wire from the headphone/monitor jack of the first Zoom into the input of the 2nd. Another option would be to run two recorders directly from the board, but most boards don’t have a lot of spare outputs for the video guy.
The other microphone we run is a wireless (Sennheiser EW 112P G3) direct to a recorder. If by chance there are no other mics, we’ll do our ‘daisy-chain insurance policy’ setup with a 2nd recorder as described above.
If you’re filming weddings for thousands of dollars, we strongly recommend using a backup recorder as an insurance policy. The H1 units are $100 and will last you through hundreds of weddings and events – and anyone who has been in the position of hitting the stop button only to see “Card Error” knows that feeling, and knows it would be worth $100 now to avoid the consequences later.
Note: This article contains affiliate links. By using them when you purchase something, a small portion is returned to us. If you find this content useful, we appreciate you using them to keep this site going.